To start off you will need a clean, dry sushi tray made of number 6 plastic(this is the number inside the recycling triangle on the bottom of the container), cutting mat and an xacto knife. I used every bit of my tray to create my beads and charms, minus a few little shards that I cut off to straighten out sides and remove sharp/jagged edges. My tray had nice little rectangles in the bottom. I used the imprinted lines as a cutting guide. I then just cut randomly sized shapes from the other pieces of the tray. The pieces which turned out best for me were about 0.5 to 1" wide and 0.5 to 2" long.


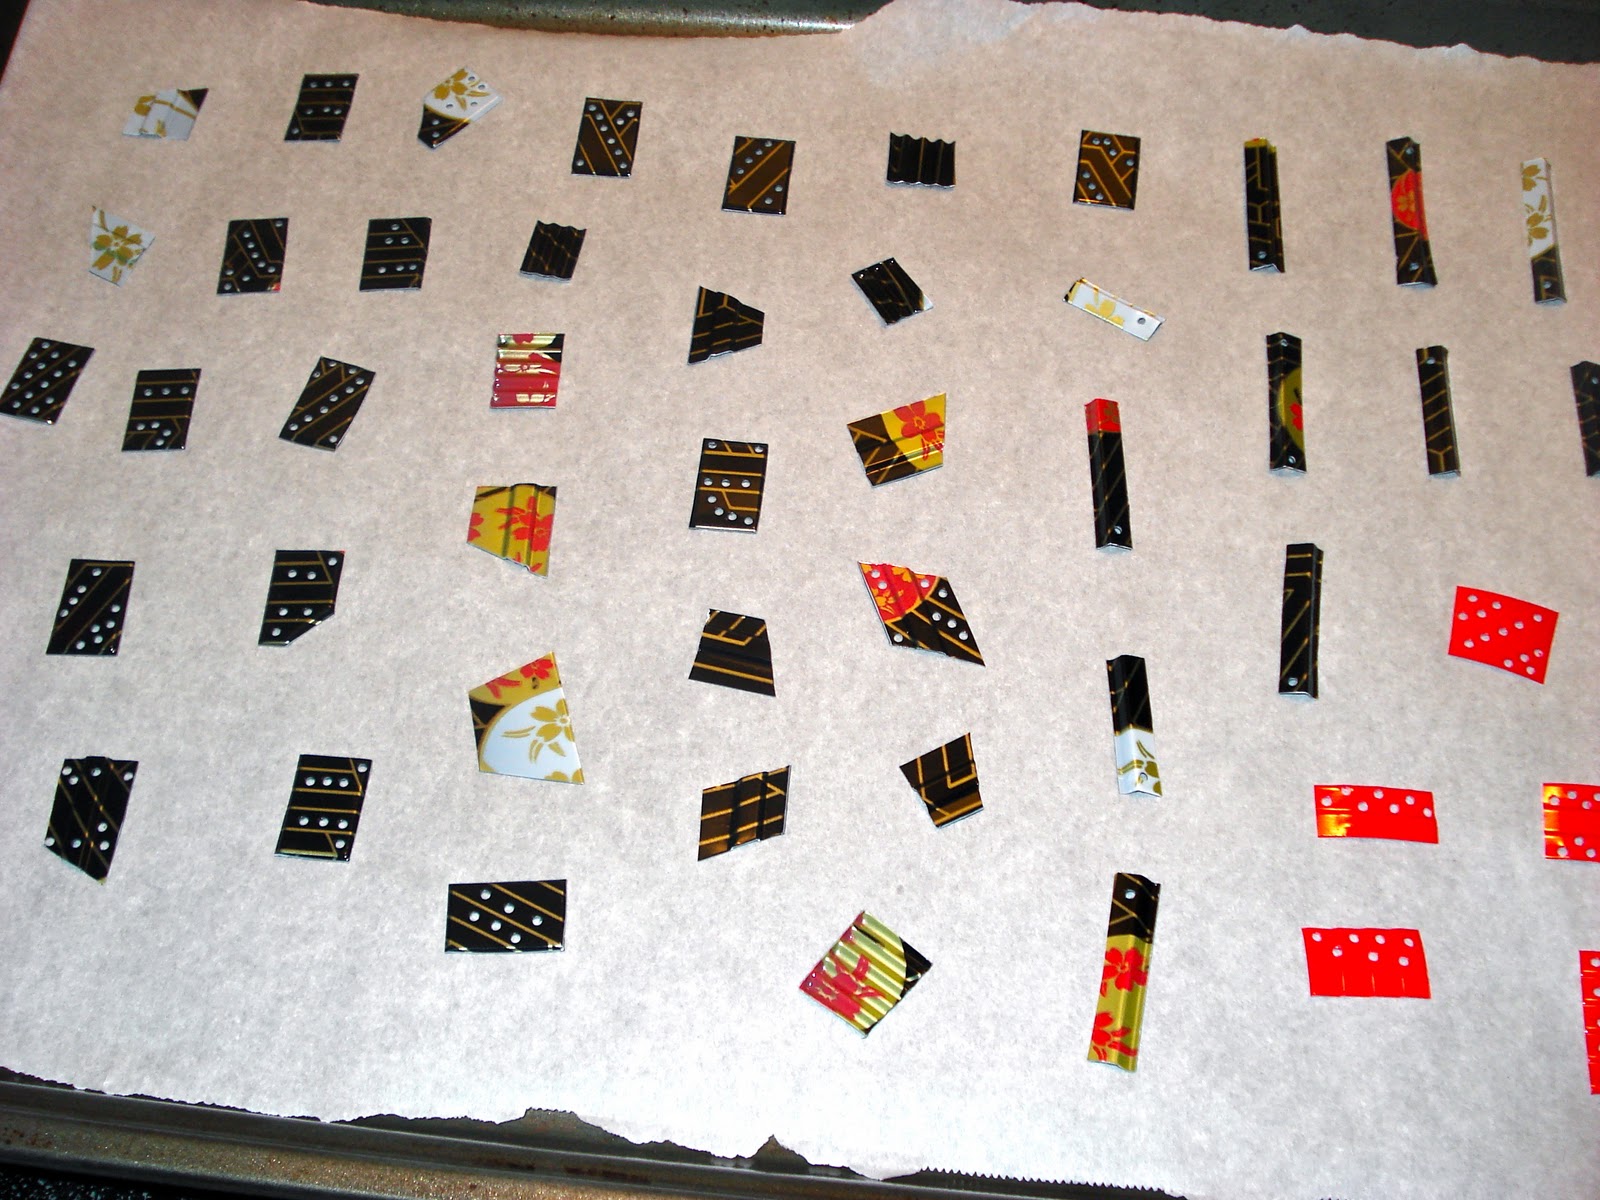
Once you have all of your pieces cut out punch some holes where you want to attach charms and to create random patterns(oopsie, forgot to take pictures at this step). The pieces with extra holes actually curled up a lot better for me. For the next step you will need an oven, cookie sheet, parchment paper and your cut pieces. Make sure you have plenty of ventilation! The plastic gives off fumes, which you want to breathe in as little as possible. For this step I recommend doing a test batch or two first to figure out optimal temperature for your oven. For me I found 215 degrees for a few minutes worked best. Place your cookie sheet covered in sushi tray bits in your preheated and well lit oven. Squat or sit down and WATCH your pieces. DO NOT LEAVE THEM UNATTENDED! After a minute or so they will begin to dance and curl. DON'T PANIC! Keep watching until they stop rolling around like a fortune telling fish, then put your oven mitts on and carefully remove the cookie sheet from the oven. Set the sheet down on a towel or top of the stove to cool off a few minutes, and turn off the oven. There will be pieces that are beautiful and there will be unusable ugly pieces. Don't fret, just go with the flow and have fun with the funky unpredictable shapely beads and charms that you can use.

Now the fun part begins! To begin making some sushi tray jewelry you will need: round nose pliers, wire cutters, another pair of pliers(flat nose, nylon, round nose, etc will work fine), jump rings, some chain(old necklaces work great. You don't have to buy new supplies to make new jewelry.), 22-26 gauge wire or eye pins, head pins, clasps, some beads/pendants/charms(again you don't have to buy new. Look in your jewelry box, junk drawer or supply stash for fun stuff to use to make your piece fit your style.) and your new sushi tray beads and charms.
First up is this asymmetrical necklace made up of beaded chains:


I then went on to create a triple layer necklace and bracelet. The layered necklace could easily be adapted to only one or two layers.

The base of the necklace is the chain the fan pendant is on. The chain is 18" long with a spring clasp, but can be made any length you are comfortable with and use any clasp you like. I used a vintage red plastic fan pendant because I felt it went well with the design on the sushi tray, but feel free to use any charm or pendant with multiple holes for attaching charms. The sushi tray charms dangling from the fan were created by running a head pin through a sushi tray bead, then making a loop with round nose pliers, and attaching the charm to the fan with a jump ring. As you can see, some of the charms on this necklace have a more conical or angled shape at one end. This look was achieved by cutting one end of my original sushi tray bits at an angle, so when they shrunk they formed the shapes you see now.

For the chain layer I placed above and behind the fan piece I first cut an 8" piece of chain. I then created 14 single sushi tray charms, 5 2" lengths of chain and 4 sushi tray eye pins. Next connect one single charm to each of the sushi tray eye pins, and one single charm to the end of each 2" piece of chain. Then, starting at the center of the 8" chain attach a jump ring with one single charm and the end of a 2" piece of chain. Moving one inch out from the center attach another jump ring, single charm and 2" chain, then move out another inch and repeat. Repeat the same process with the other two single charms and 2" chains on the opposite side of the center charm. Then attach one of the four double drop sushi charms in the center of two of the single drop charms and chains, then repeat, so that when finished it looks like the image below.

You will then use small jump rings to attach the ends of your 8" chain to your first 18"(or selected size) chain. To do this measure 4"(or add one inch to this for every 2" larger than 18" that you went) down from one side of your clasp and attach one end of your 8" chain. Then, repeat on the opposite side of your clasp. This will give you an inner chain of about 16".

For the third, lower section, of my necklace I attached 5 hexagonal filigrees in a V pattern. They are held together by looping a small jump ring through the sides where they touch. I had two holes on each side, so I used two jump rings to give more stability and hold the V shape better. Next you will need 3 long sushi tray charms with one hole, 2 short sushi tray charms with one hole, 2 long sushi tray charms with a hole at each end and 4 eye pin charms. To make my eye pin charms I strung one red bead, one clear bead, a center punch sushi tray curl, one clear bead and one red bead, then closed the wire in a loop with my round nose pliers. Once you have all your charms attach the two short single hole charms to the long charms with a hole at both ends. You will then use jump rings to hang one long charm at the outside of your V, then moving inward hang an eye pin charm on the next open side, then a double sushi charm, then eye pin charm, then single long sushi charm(this one hangs from center point on a hole a bit higher than others), then eye pin charm, then double sushi charm, then eye pin charm, then end on final open side with your last single long sushi charm. You will then attach a jump ring to the outside point on either side of your V pendant. Add a 6" piece of chain to the jump rings on either side of the pendant. Next measure 2" down on your main necklace chain from the point where you attached the previous section of chain. At this point add a small jump ring and one end of your chain on the V section. Repeat on opposite side of necklace. You have now finished the triple layer sushi necklace.

The final piece I created from my sushi tray was this bracelet. It does not use pieces I shrunk in the oven. To make it you will need: 4 pieces of chain, jump rings, pliers, a 1/16" hole punch, 8 or so small rectangles of sushi tray and a clasp or some sort of closure. First punch a hole in the corner of each of your sushi tray pieces.

Next, use jump rings and pliers to connect the sushi tray pieces together with the jump rings.

Once all your sushi tray pieces are connected lay it across your arm a few inches up from the base of your wrist. This will be the resting point of the bracelet. Using your thumb and middle finger to press the two end points of the sushi chain to your arm and lift your arm to check the distance between the two points. This will help you determine what lengths of chain you need. For mine I needed 4 pieces that were each barely longer than an inch. However, to determine your length measure your closure and subtract that length from the total distance you still need to cover. Then half the distance you still need to cover to get your chain length. For my closure I used 2 double strand to single strand pieces and a large carved bead on an eye pin. You can replace the double to single strand pieces with a single jump ring and use a clasp instead of the bead. I made my bracelet without an opening closure, so it fits me more like a bangle.

Thank you for visiting my blog and reading through my very long, wordy and picture heavy tutorial for some ideas on sushi tray jewelry. I hope you are leaving feeling inspired to create a piece of your own! I would love to hear your ideas and see your recycled sushi tray projects as well.
Please take a minute to visit my online shop and don't forget to vote for your favorite upcycled sushi tray project on the Etsy Fort Worth blog.
P.S. This is the first tutorial I've ever written, so please comment or email me with any questions you have.


This is such cute ideas by Robot Pop.
ReplyDeleteVery neat- I never thought about making beads and charms from plastic. My daughter will go ballistic!
ReplyDeleteI just found your work and I love all of it. I do not make beads but found your work very lovely I could not believe it was all from a recycled plastic tray. Your tutorial was very easy to follow and makes such wonderful pieces.I do not make charms (yet) but now I have been thinking about how I can add them to my custom cards. Let me know if it is ok to post your tutorial on my small blog. Thanks
ReplyDeleteHi, Edie! Thank you for your kind words and for visiting my blog. You're welcome to re-post my tutorial on your blog. Please include a link back to my blog from your post and include a note that the tutorial originated here. I'm actually wanting to start working on my paper crafting some more, so maybe we can trade, and I could share one of your posts here.
Delete